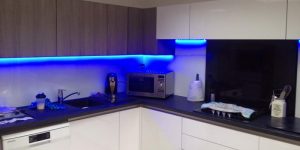
- Your LED Tape (we have chosen to use 15w white 24v LED strip-lights)
- Your Transformer (we’re using an IP67 30w 24v Transformer)
- Heatshrink (we chose black type IP67 coating)
- A screwdriver
- Lead-free solder
- A soldering iron
- Scissors
- A glue gun

Step 01.
Your first step is to measure the area where you intend to install the LED tape, and cut the LED tape to length at the nearest cut point. (If you prefer, you can simply tell us the lengths you need when placing your order, and we can cut and solder your LED tape to the right size. That way, you can skip straight to step 02).
Step 02.
After cutting your tape to length, use your soldering iron to solder two blobs of lead-free solder onto the two copper pads on the LED tape.
Step 03.
Once that’s done, add a little bit of solder to the copper wires on your transformer, then solder the wires to the LED Tape. Do be sure to solder the correct wires to the correct pads: the positive wire (which will be either red, brown or black) goes to the + pad, and the negative wire (either blue or white) to the – pad.
***WARNING*** MAKE SURE YOU HAVE TURNED OFF MAINS POWER OFF BEFORE THIS STEP! ***WARNING***
The next step is to wire your transformer to your mains power. You will find your transformer has three wires – brown (Live), blue (Neutral) and yellow/green (Earth). Match these to your mains power and connect them by soldering the wires together. We advise that you place heatshrink between each join, so they do not touch.
Step 05.
Now screw your Transformer to the underside of your cabinet, positioned so it is out of sight .
Step 06.
Once your Transformer is securely in place, you’re ready to install your LED tape. Begin by peeling off the protective backing, then stick the LED tape to the underside of your cabinet. For the best results, we recommend you position the tape towards the front edge.
Step 07.
You will probably find that the cable from your Transformer to your LED tape hangs down, if so you can use a hot glue gun to stick it into place.
Step 08.
Switch on to make sure that everything is working perfectly. Then make yourself a cup of tea, sit back and enjoy your new lighting… basking in the satisfying knowledge that it’s all down to you.
