


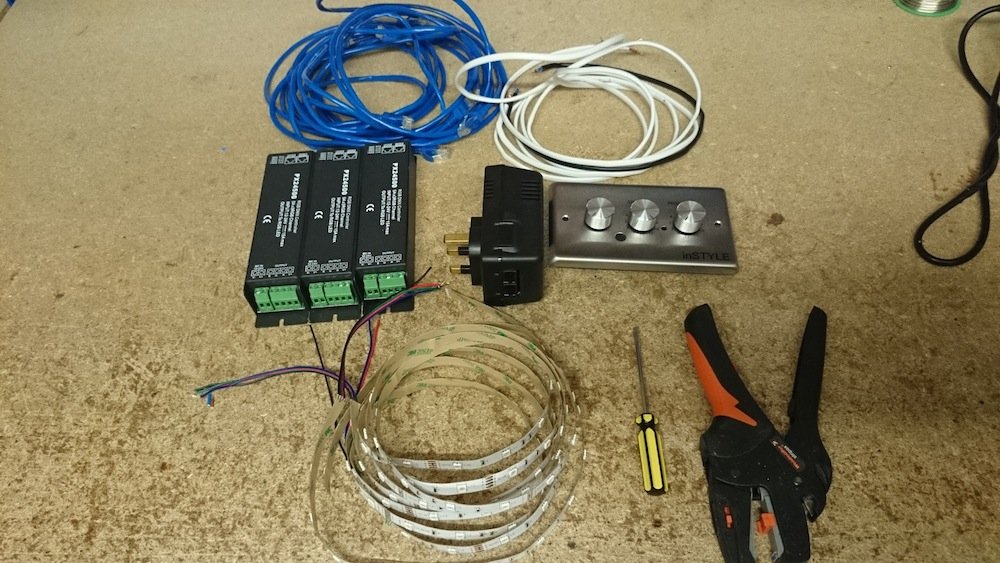
Tools:
- PX24500
- Wall Controller
- Cat5 cables
- 2 core cables
- Flat head screwdriver
- Wire cutters
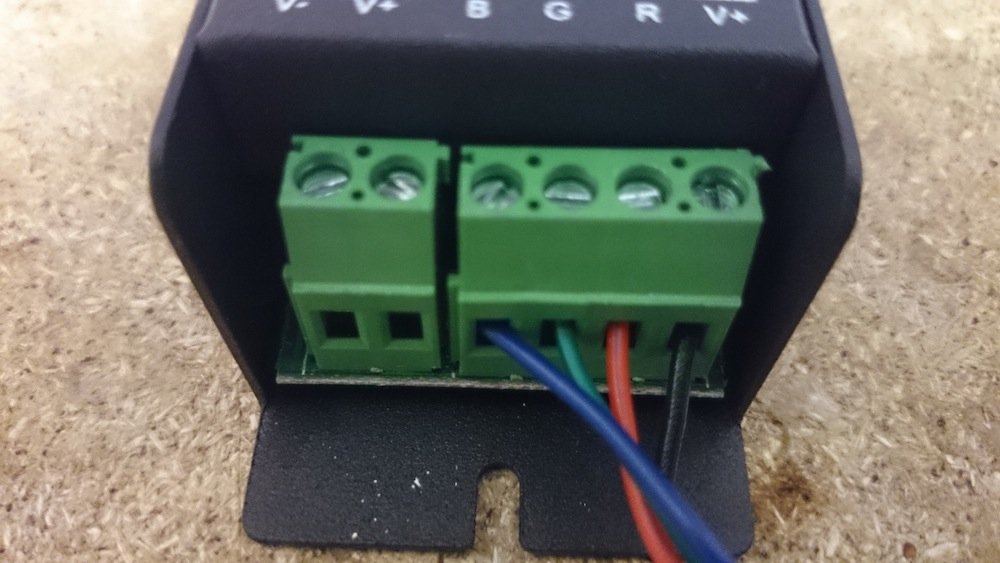
1. Unscrew the screws on the PX24500 and place the RGB tape into the correct connections Black to V+, Red to R, Blue to B and Green to G, then tighten to keep them in place.
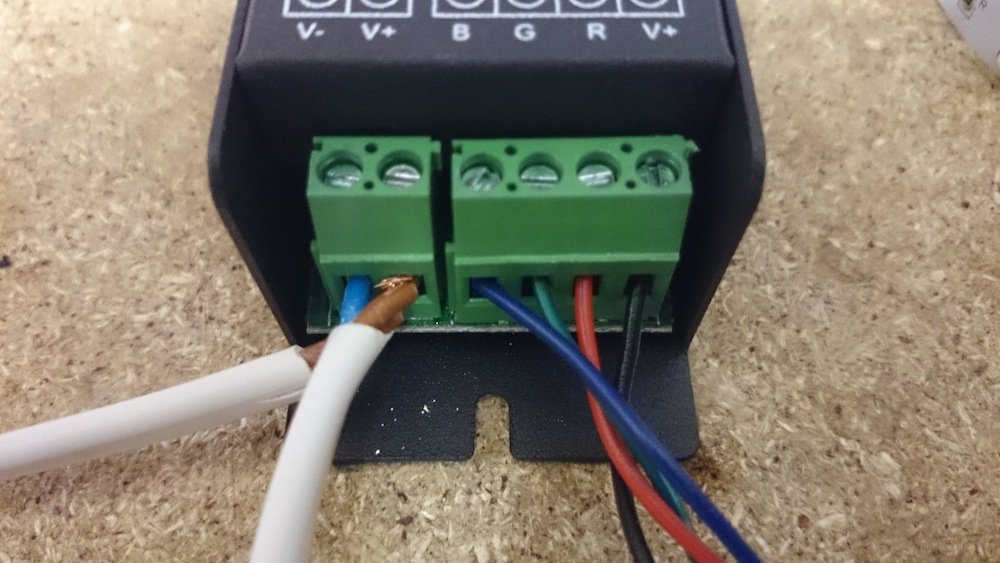
2. Unscrew the power connection screws and place your 2 core cable into the correct + and – connections and then tighten to keep them in place. If you are adding more than one then you must daisy chain them together, by chaining the 2 core cables into each other. Keeping one free for the power supply.
3. Take a cat5 cable and make sure one end has the plastic end is cut away.
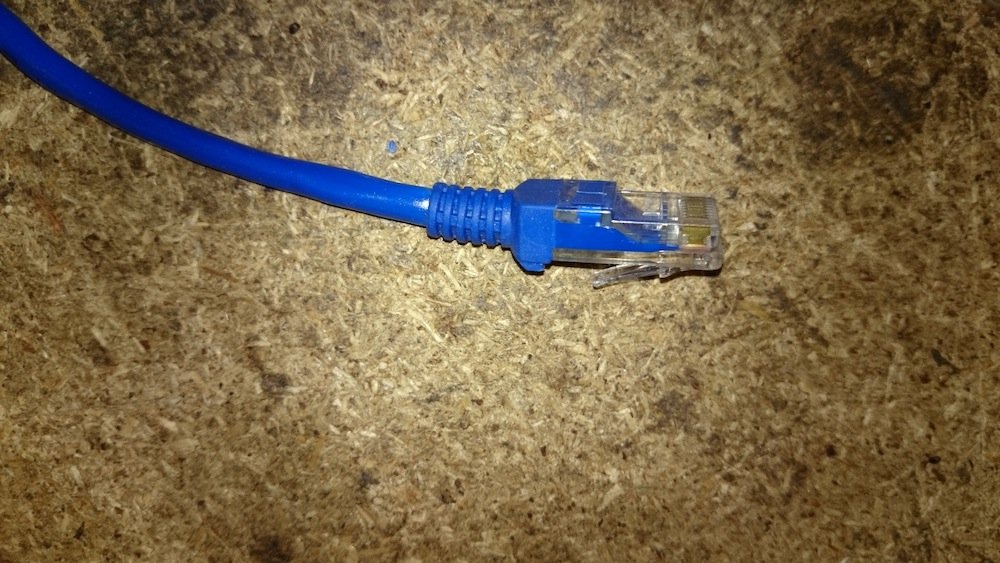
4. Insert the cut end of the cat5 cable into the slot on the back of the wall controller.
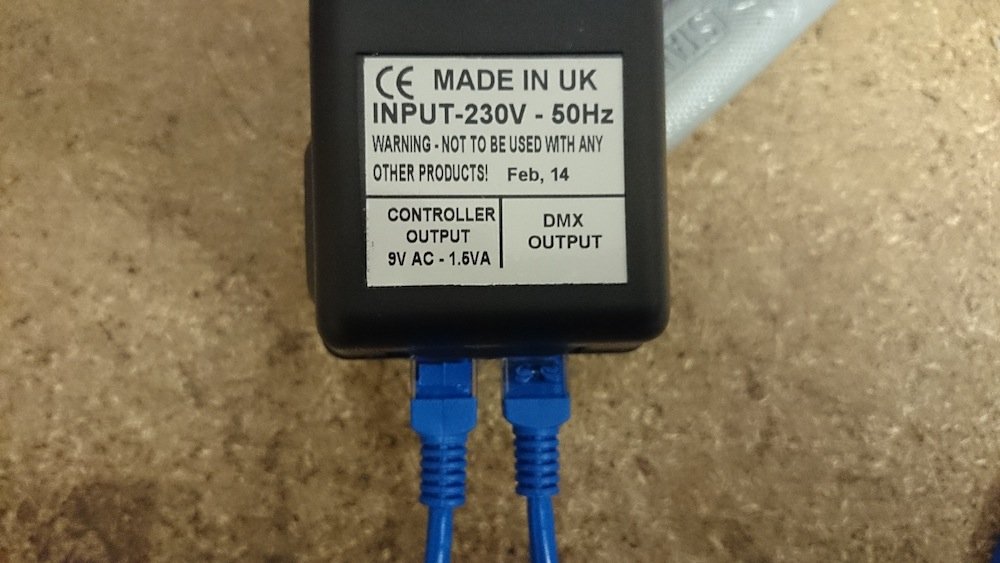
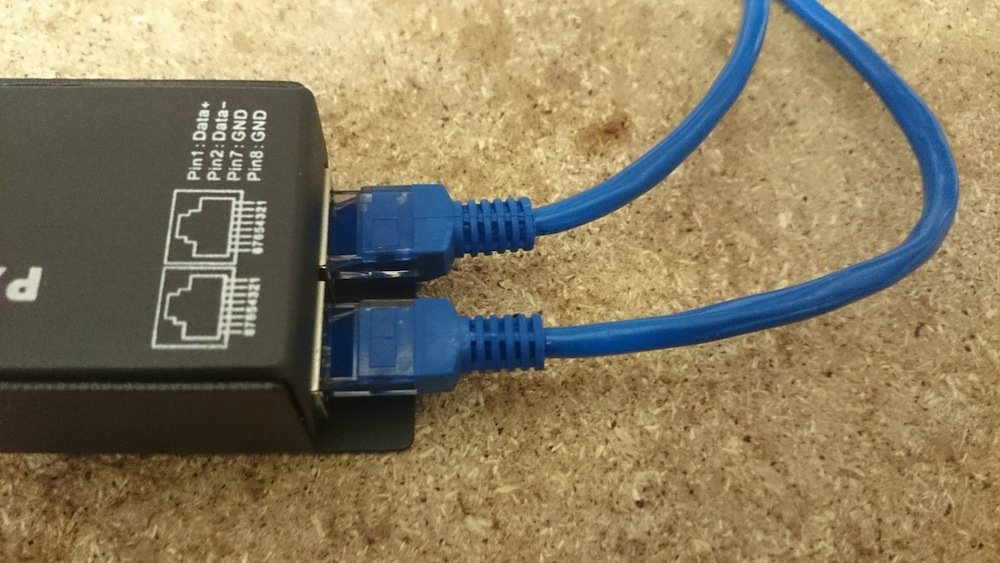
5. The cat5 from the wall controller is placed into the power pack in the controller connection point. Place another cat5 cable in the DMX output connection.
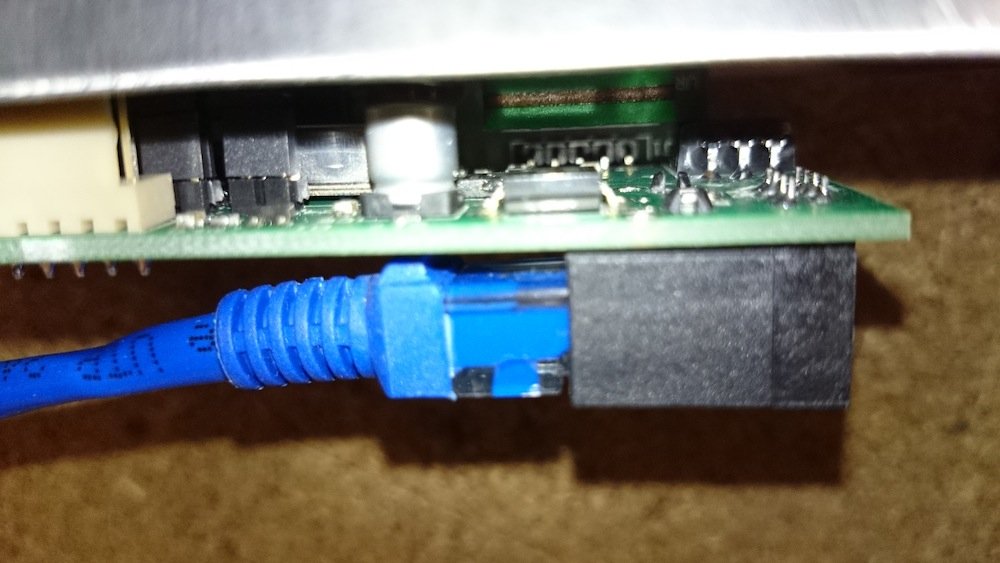
6. The second cat5 cable from the power pack is then placed into the PX24500 (in the picture it is inserted in the bottom connection). If you have more than one then you must daisy chain the cat5 cables from each unit placing it into the bottom connection and the second exiting from the top connection.
7. Place the power pack into the power socket.
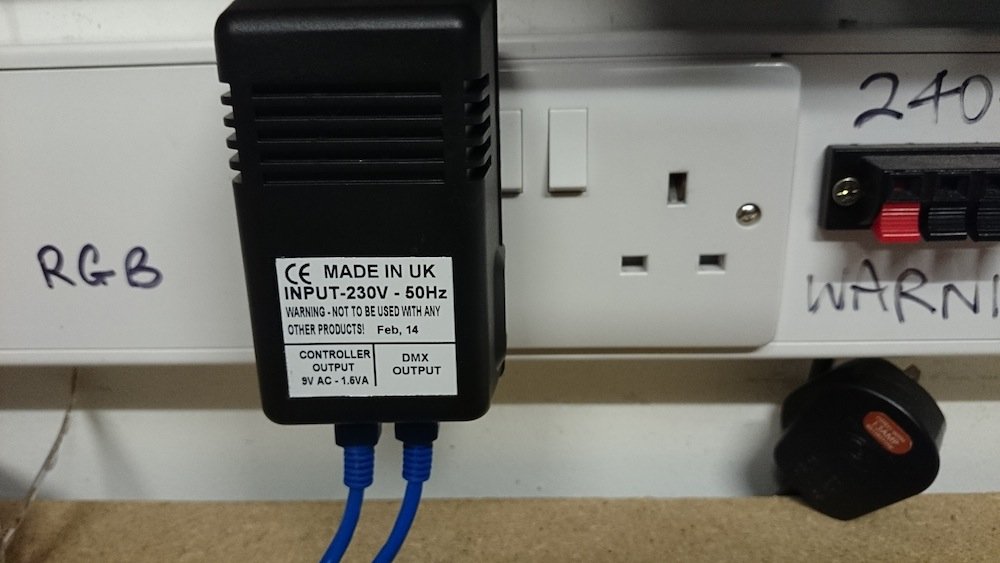
8. Connect the 2 core cable that is free to your power supply.
9. Your RGB LED Tape should then light up and you can use the wall controller to set it to different modes and choose colours you want.
