


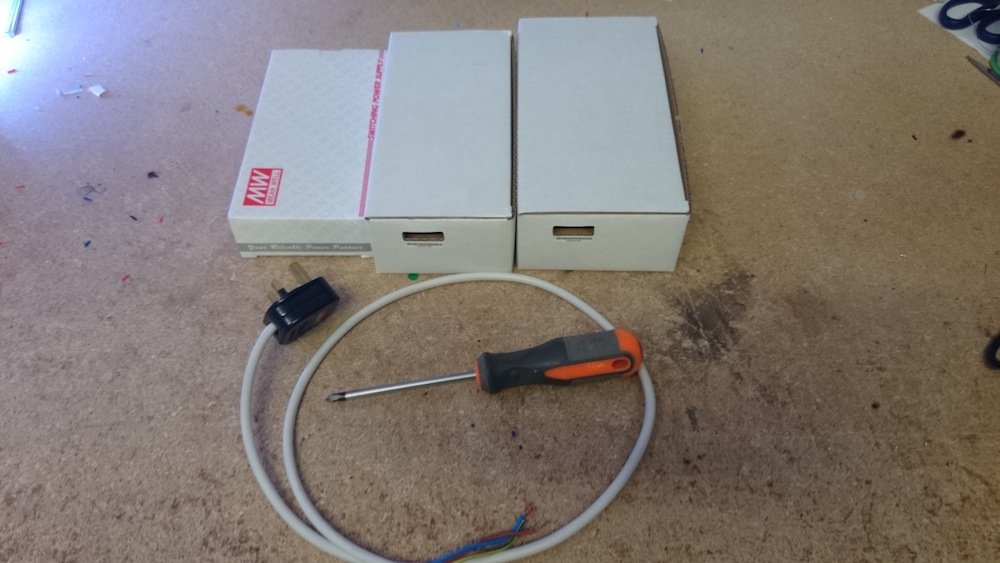
Tools:
In addition to your driver and LED tape, all you’ll need is
- a screwdriver
- 3-core cable power lead
- 2-core LED tape
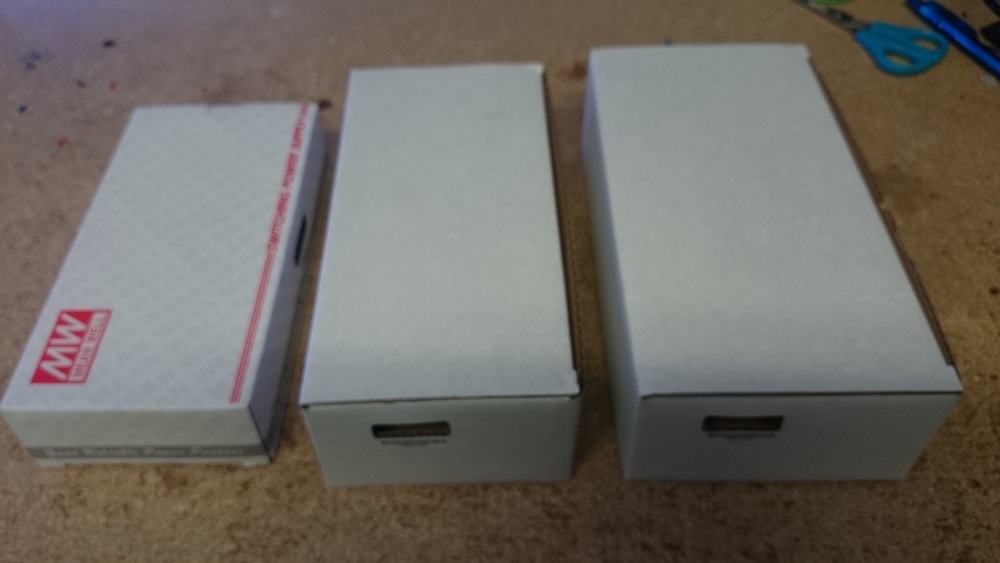
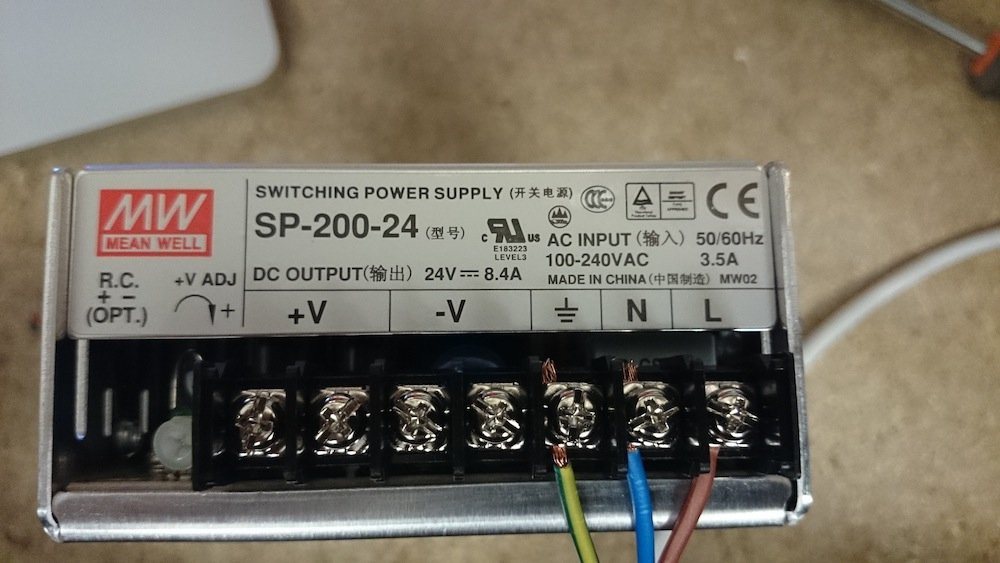
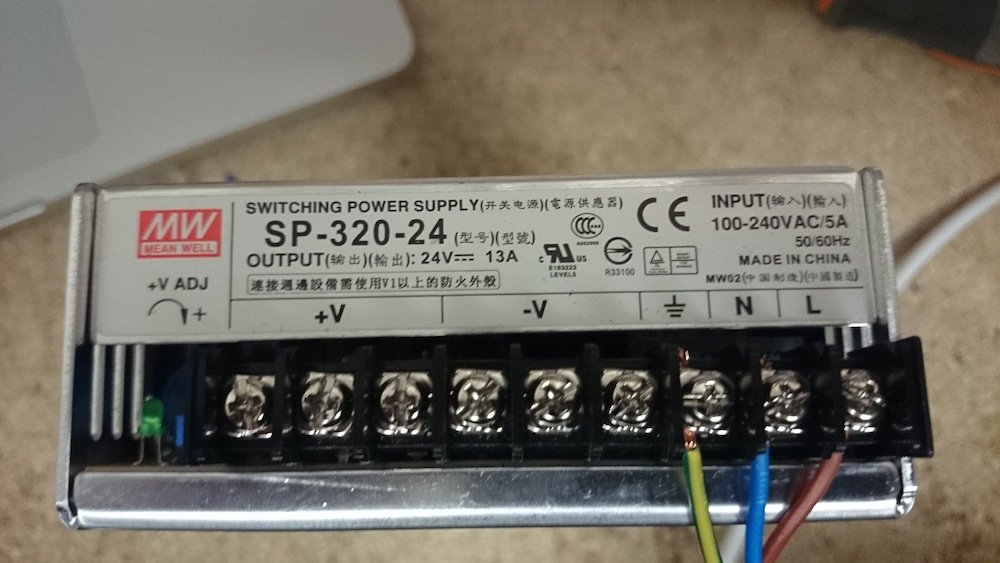
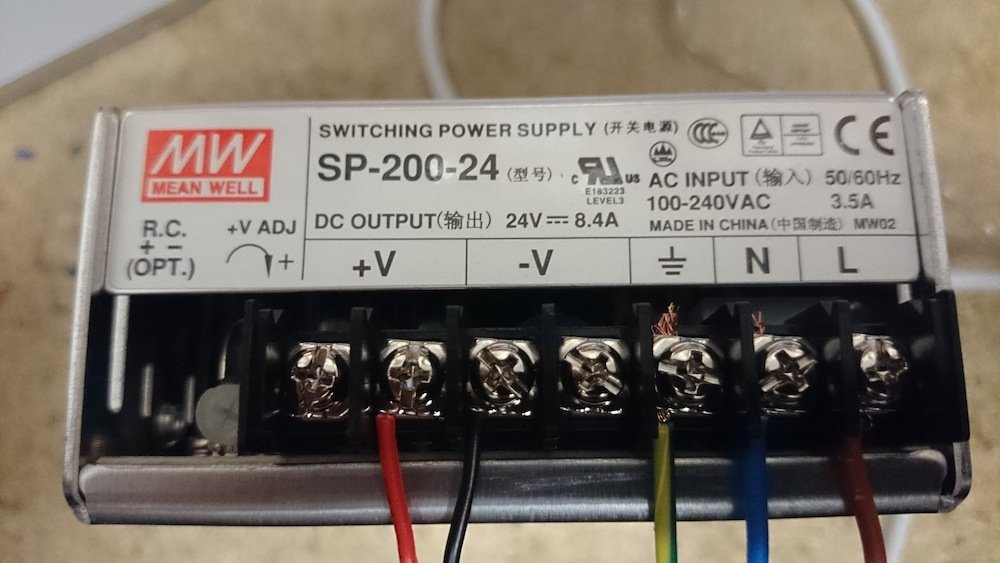
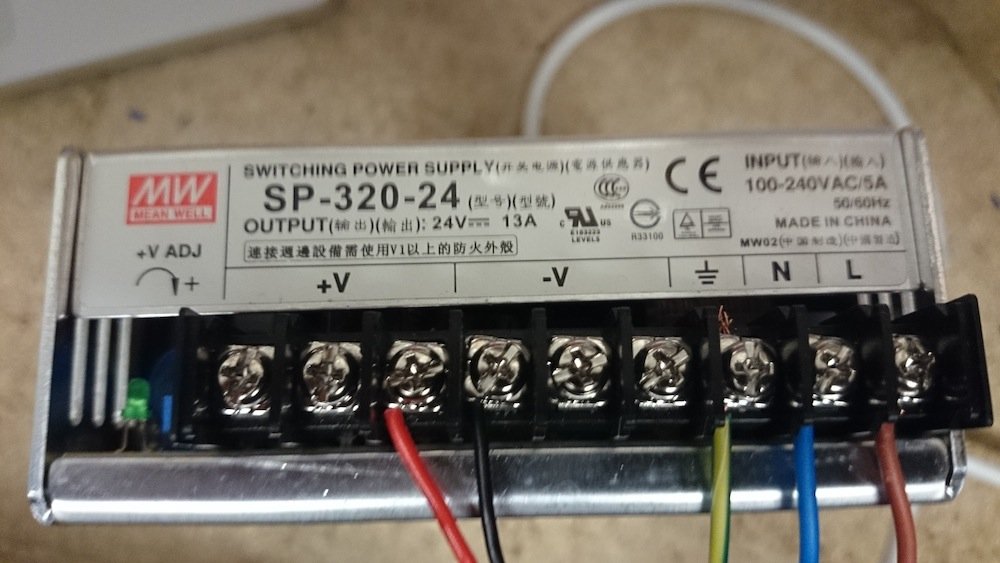
1. There are three different types of internal Meanwell drivers, 150w, 200w, and 320w – as seen in the picture below from left to right.
2. Take the driver out of the box. At the back, you’ll find connection terminals with screws.
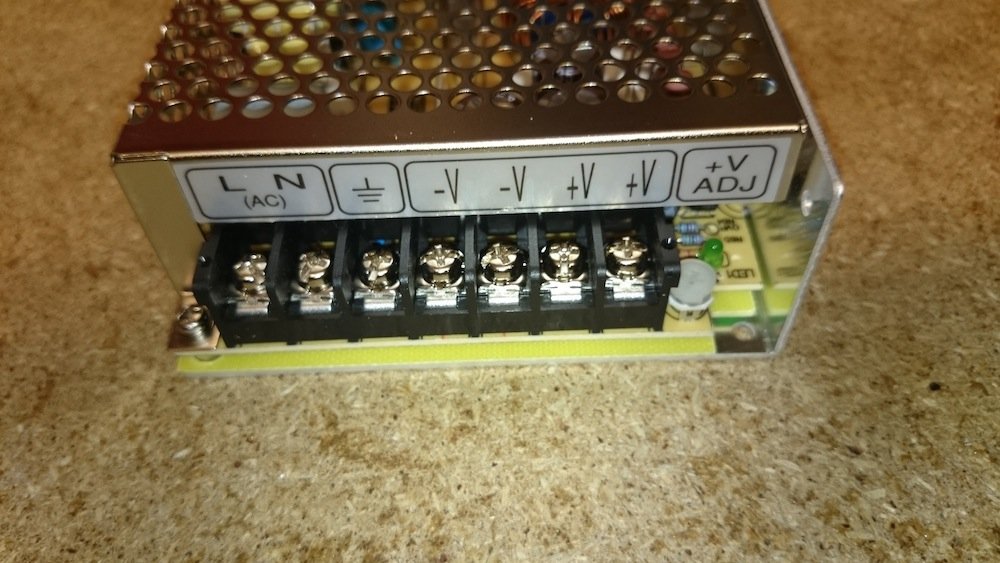
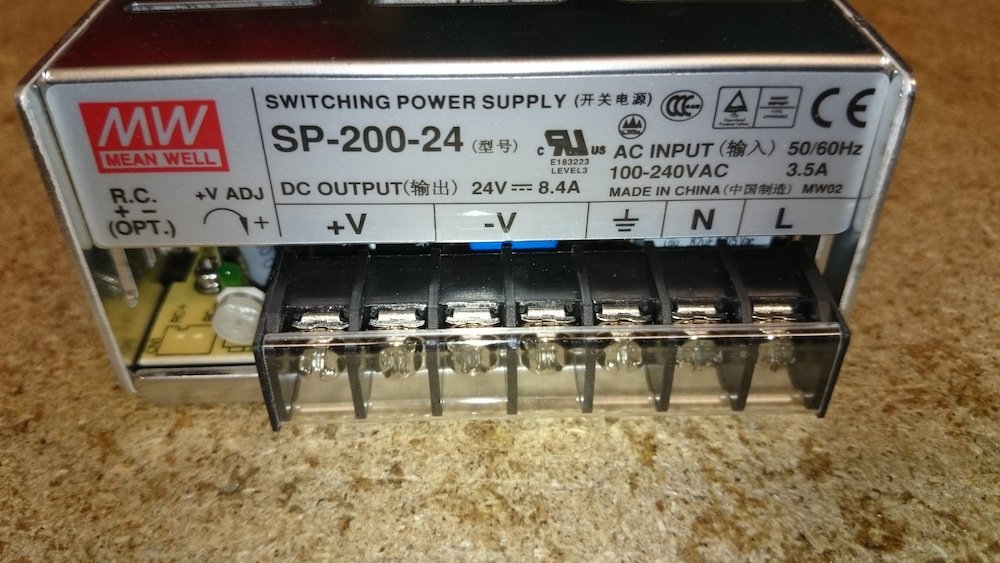
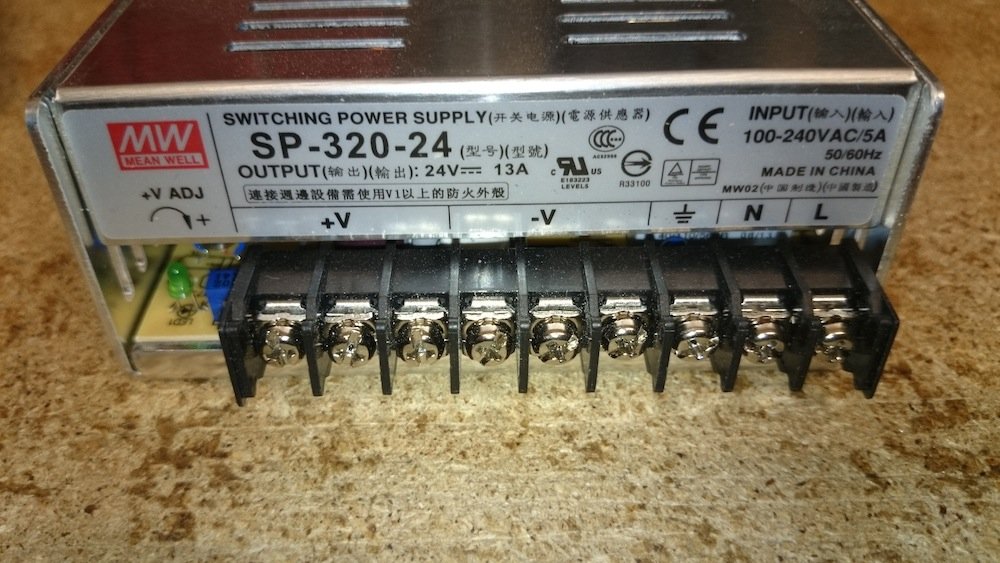
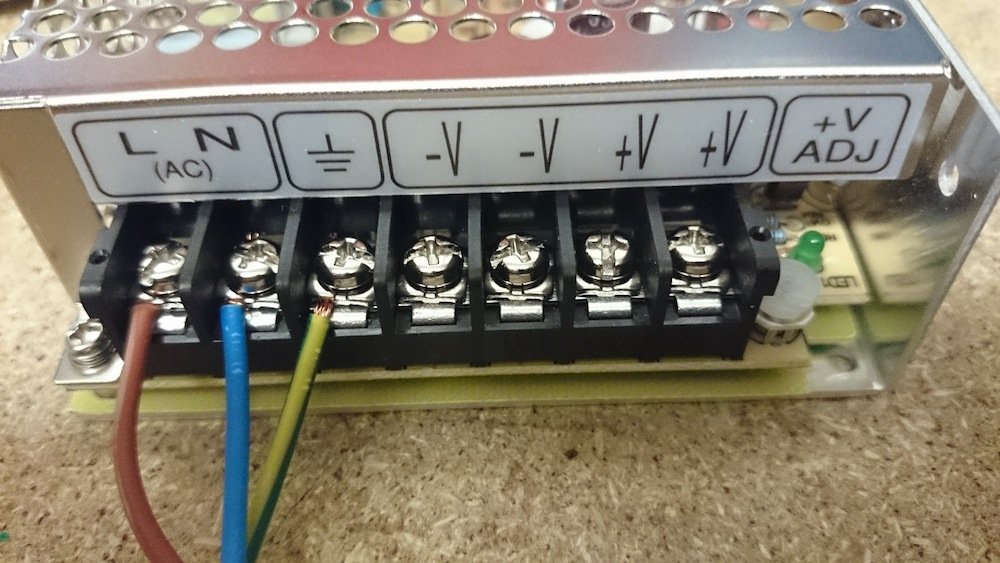
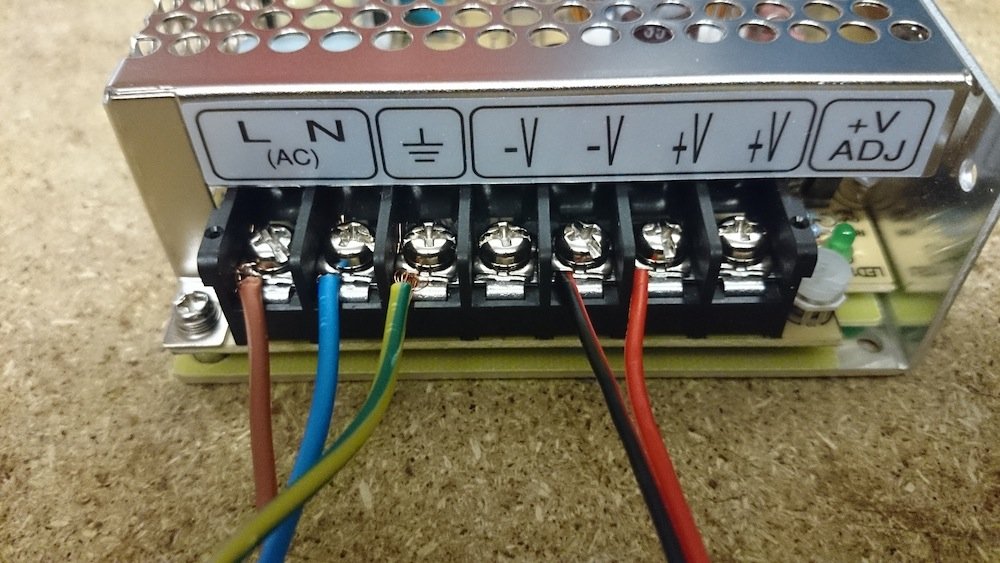
3. Unscrew the L, N, and the symbol connections – which are found on the right hand side of the 200w and 320w Meanwell drivers, and on the left on the 150w driver.
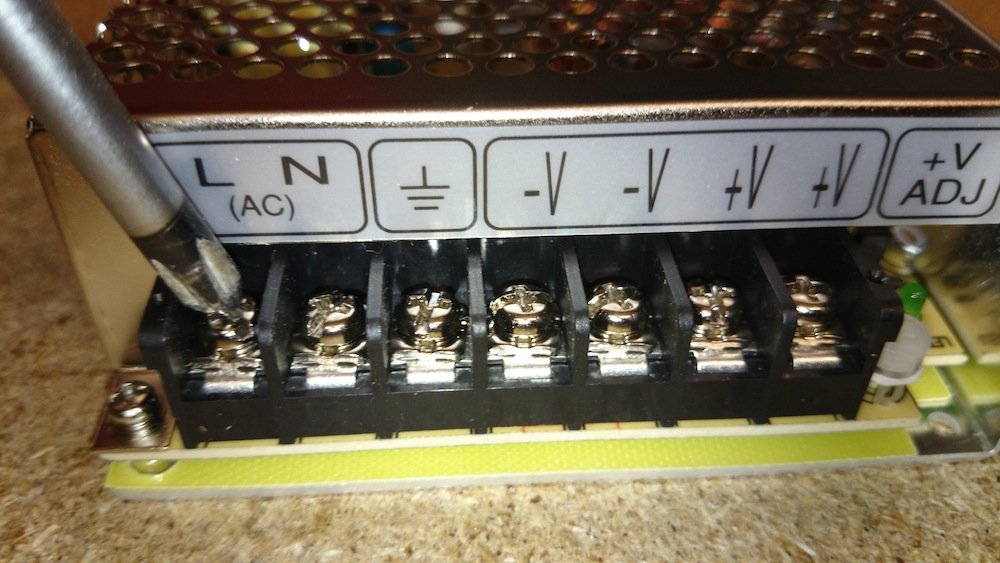
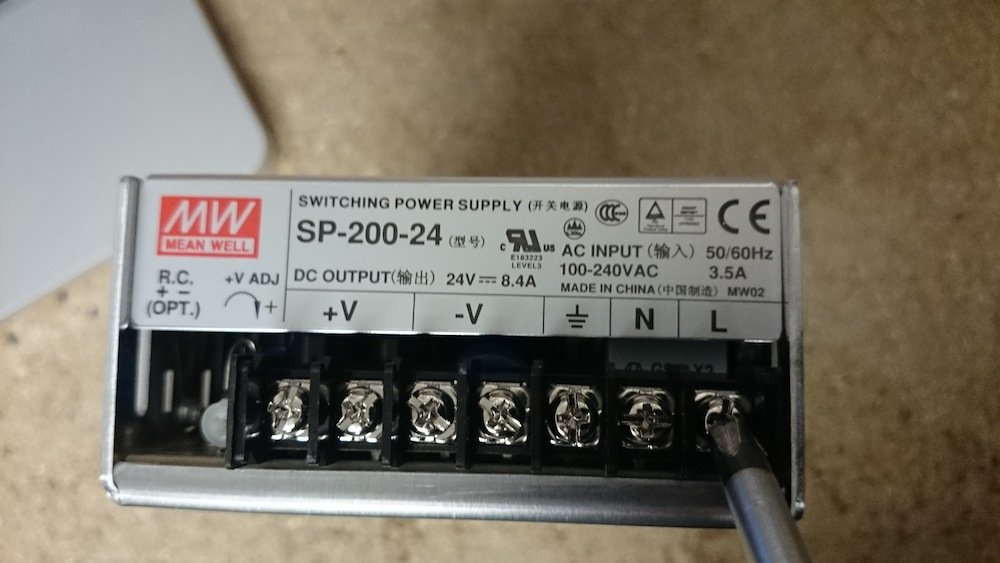
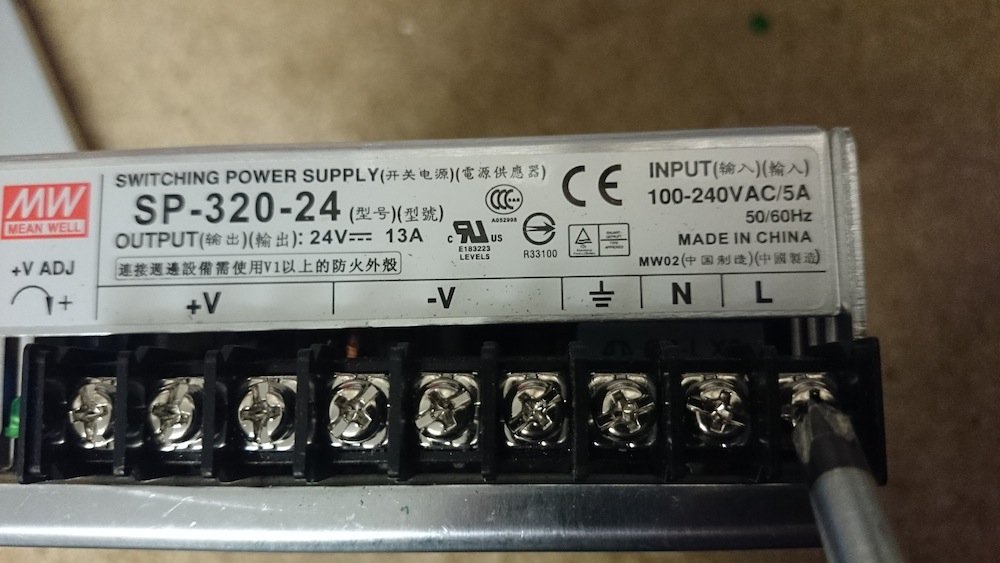
4. Take the 3-core cable, and connect each cable to the correct matching connection. The Brown cable should be wired to the L connection, and the Blue cable to the N connection. Finally, the Green/Yellow connects to the Symbol connection.
5. Now take the LED tape you intend to power, and connect each of its cables to the correct connection. With 2-core cable, you should connect the Red/Brown lead connects to ‘+’ and the Black/Blue lead to ‘-‘.
6. Your Meanwell drivers are now fully connected, and ready to be used.