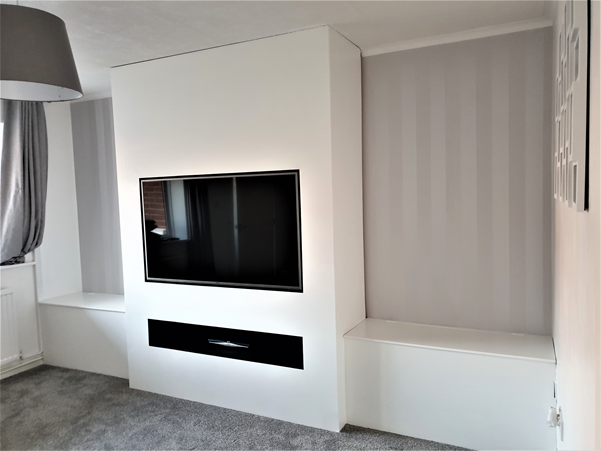
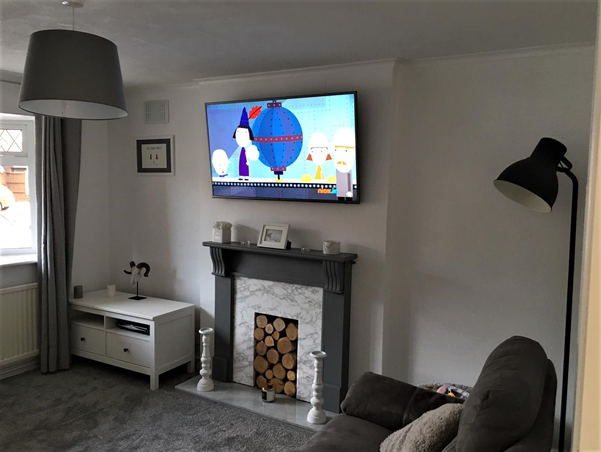
1.
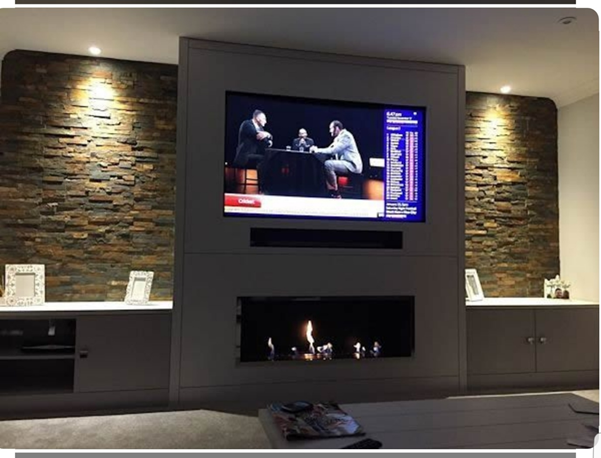
Dan’s object was to construct an attractive housing for his 55″ TV. His first step was to get a clear idea of the final effect he was going for.
“I used Pinterest to find some inspiration for the style and effect I wanted to create,” Dan says.
2.
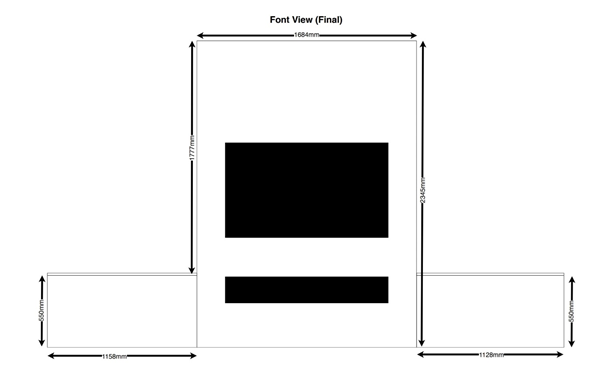
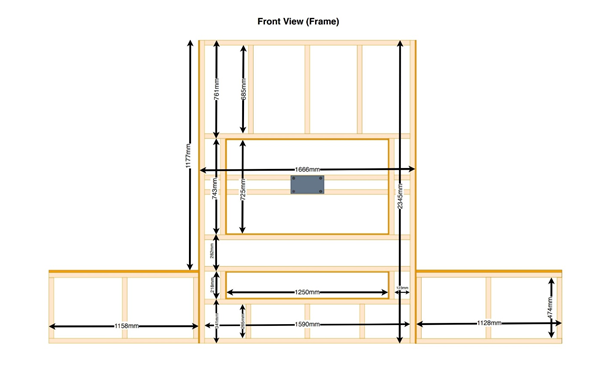
The TV housing was intended to cover the room’s existing fireplace, the next step was to get the dimensions of the new wall.
“After I had all the measurements,” Dan explains, “I then created a scale plan for the timber frame.” Now equipped with with all the cutting lengths he would need, he chose to use 3”x1.5” stud wall timber and 12mm MDF boarding.
Dan used a MDF finish over plaster, as he wanted the project to be removable if he decided to redesign the room in future.
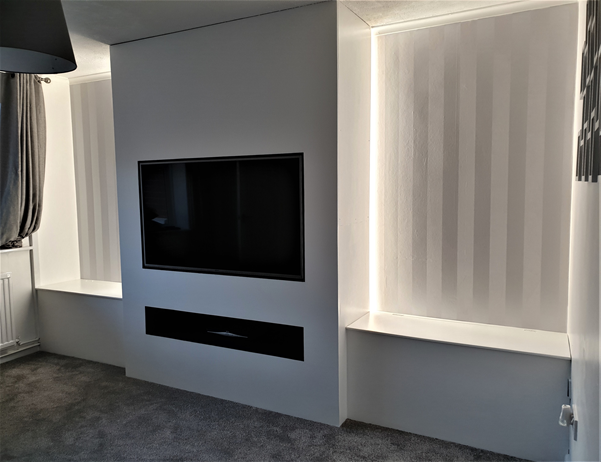
3.
“I spoke to the sales team at InStyle LED about the type of lighting effect I wanted to create,” Dan says, describing a rear glow that would be bright enough to illuminate the room. “They advised me on all the products I would need to achieve this, and how to install the LED to create the best effect. This helped me plan the best way to create the frame to allow for the LED to create the effect I wanted.”
4.
Once the project had been fully planned, end to end, and all materials had been purchased, Dan then went about removing the existing fireplace.

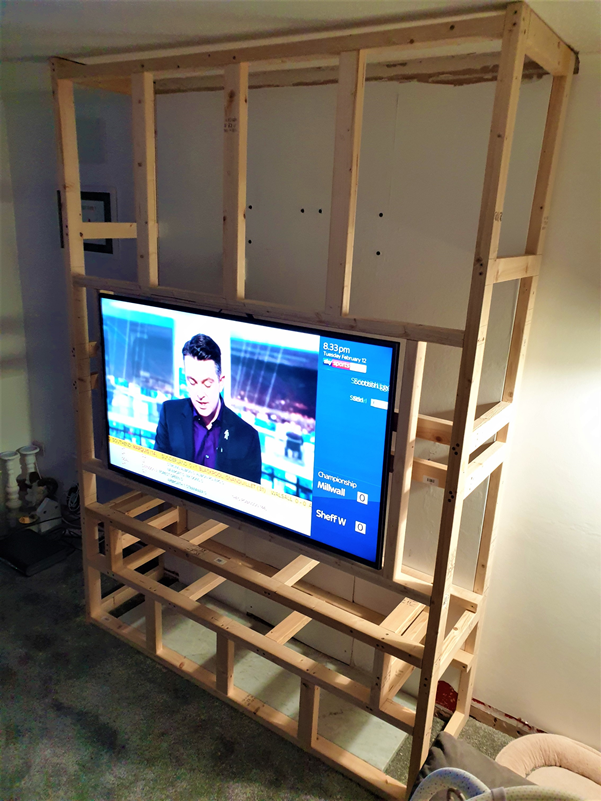
5.
Now construction proper could start.
Dan’s first task was to build the frame, following his scaled plan, and install it in place.
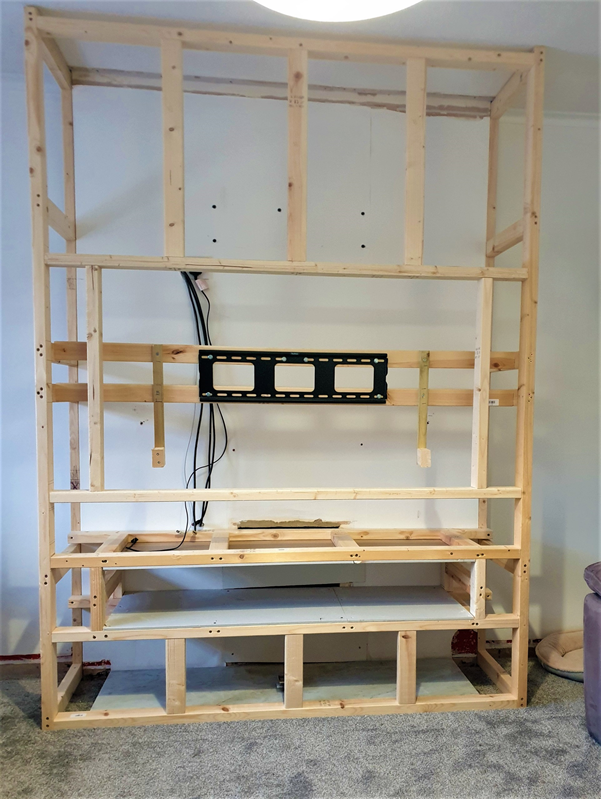
6.
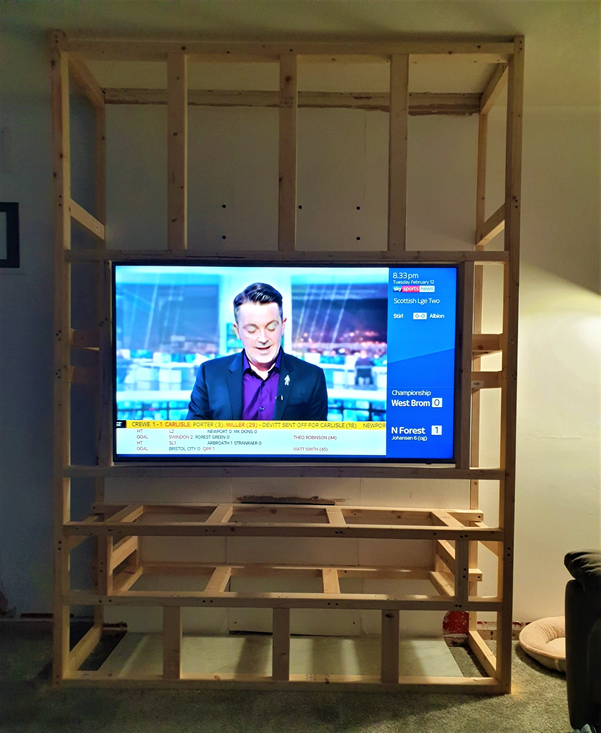
With the frame now installed, Dan moved on to fit his LED strips around the new TV wall and alcoves on either side.
In his discussions with InStyle, he’d selected neutral white LED strips (approx. 4000 Kelvin). These 24V LED strips draw 20 watts per metre, which is plenty bright enough to comfortably light the room in the evening.
The strips are powered by a 100-watt LED driver. Control and dimming is managed via one of InStyle’s all-in-in-one remote/receiver kits.
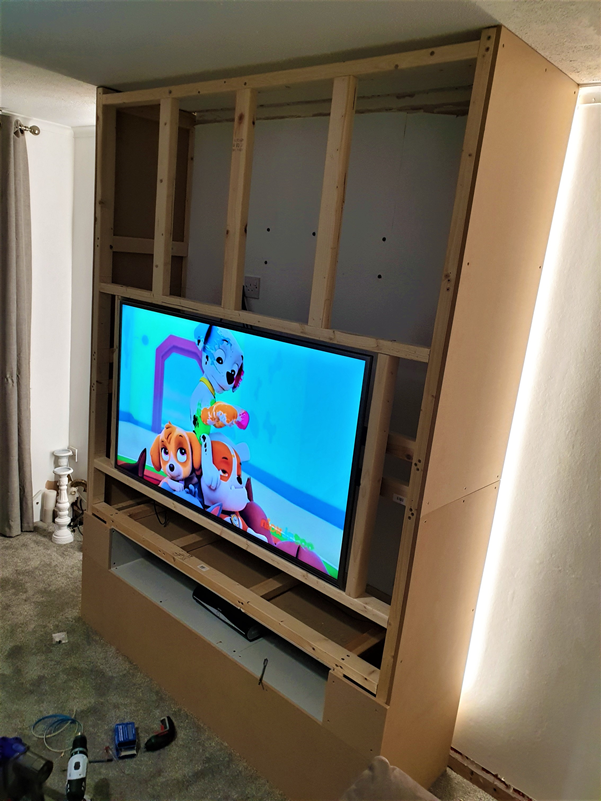
7.
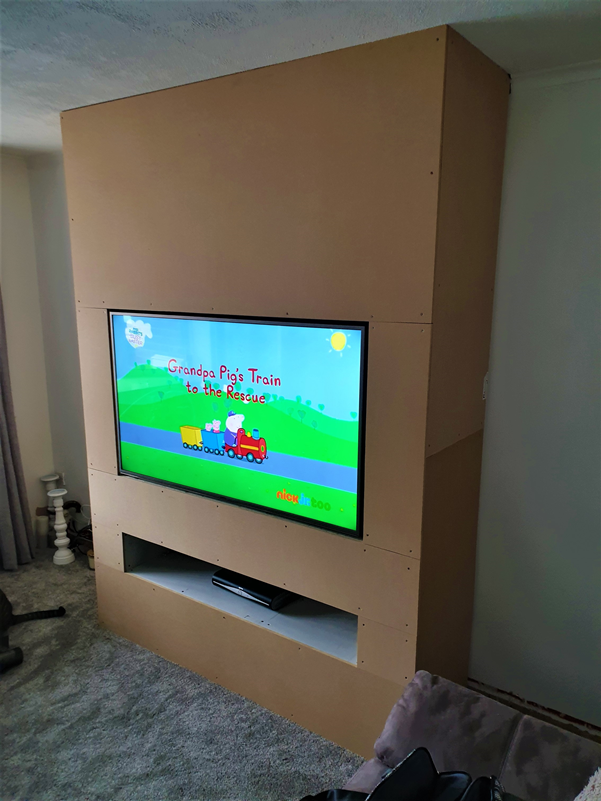
LEDs now all fitted, wired and working, Dan could now begin installing the TV wall’s MDF panelling.
8.
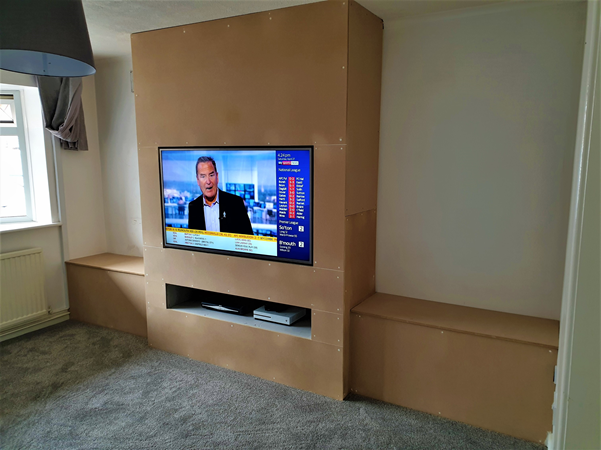
“Finally, all that was left to do was paint all of the MDF firstly using a MDP primer and then emulsion,” Dan tells us.
Check out Dan’s pics to see the striking results of his finished work!