


LEDs for handrails and bannisters
LED tapes can be used to bring feature-lighting and colour to handrails and bannisters. They can be installed both indoors and out.
Fitting strip lights to handrails and guards can be less straightforward than many other LED projects.
To produce professional, attractive results will require some planning and preparation. This guide is intended to help!
Recessing Extrusions:
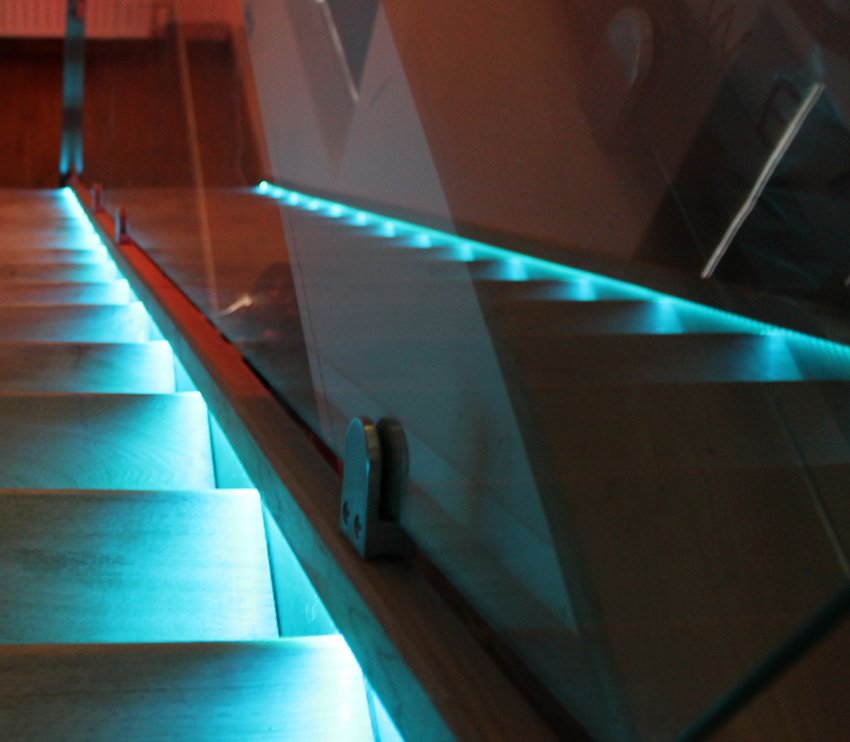
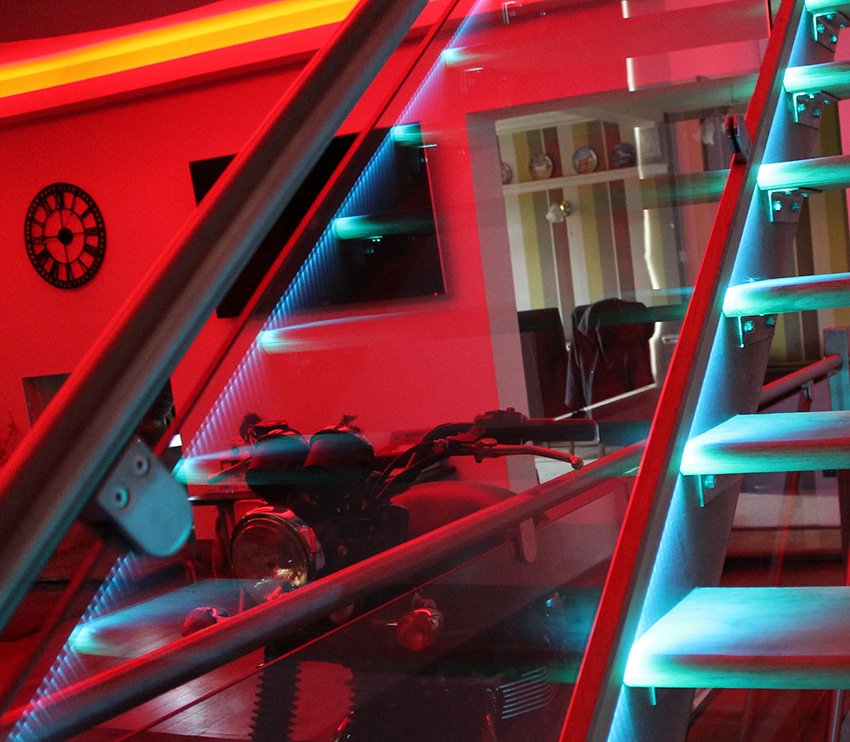
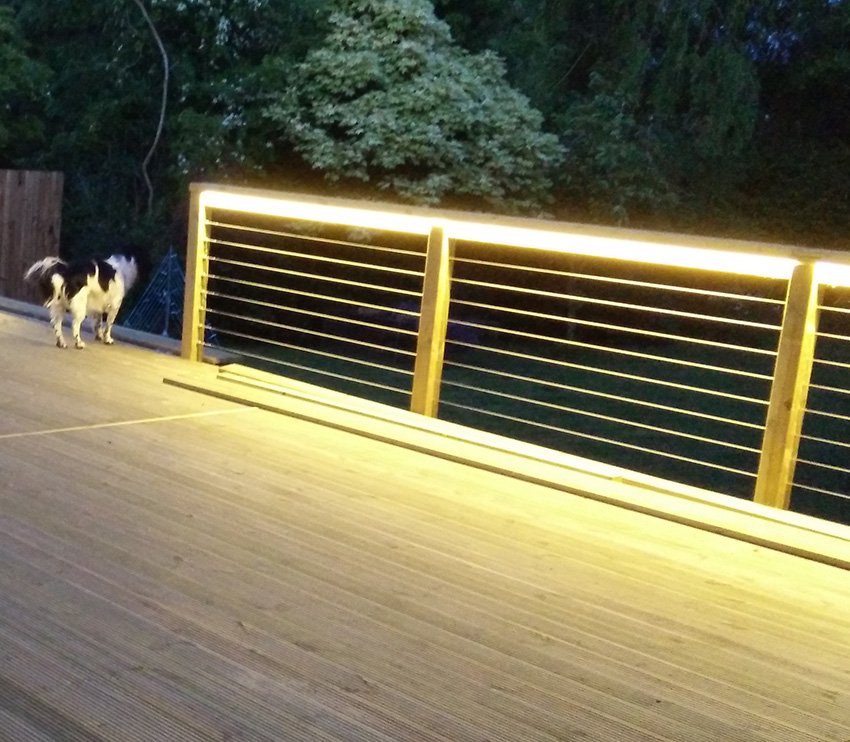
Housing your handrail LEDs in extrusions (aka LED profiles) will typically produce the best effect. An LED extrusion comes with a frosted cover, which will diffuse the LED strip’s light and eliminate any appearance of ‘dotting’. The aluminium housing will give your lights a more complete, ‘finished’ look, and protect the LEDs from being brushed or touched.
Ideally, the LED extrusion should be fitted in a groove or recess, rather than stood proud on the handrail’s surface.
It should be possible to get your handrail supplied with the groove already in place; if not, then you’ll need to rout it yourself.
(Routing is a challenging task, not recommended for the beginner!)
Tape Lengths & Voltage Drop:
LED tape lengths longer than 6 metres may suffer from voltage drop, which can cause uneven brightness/dimming towards the end of the run. But it’s quite easy to fit an LED tape run longer than 6m, as long as you plan ahead.
There are two approaches you can take to avoid voltage drop:
- Wire the LED strip in a ring main (powered both ends), which will drive a run of strip-lighting up to 12m long,
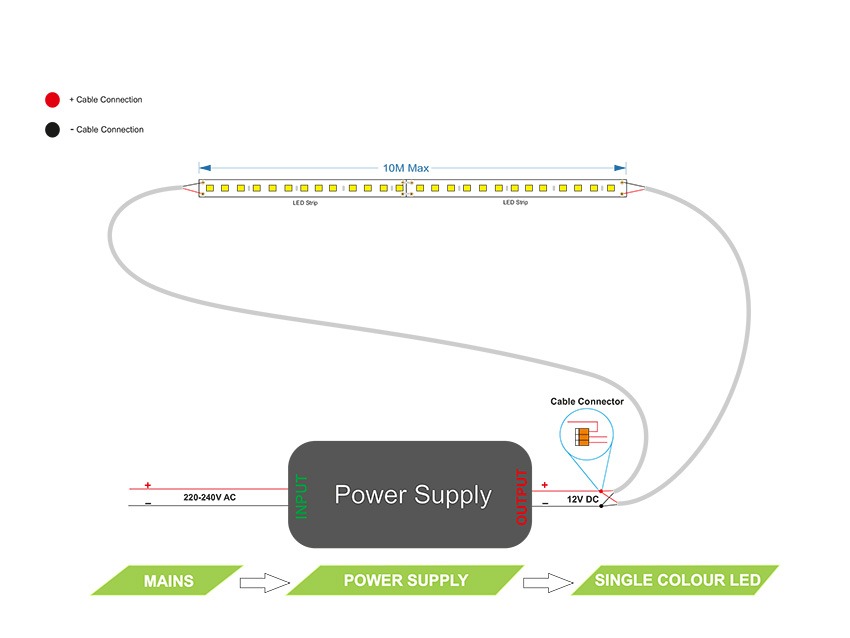
-or-
- Cut your LED tape to 6m lengths and run a discreet power cable to the start of each one from your LED driver. (Maybe hide the cables in grooves or recesses, like the lights themselves.)
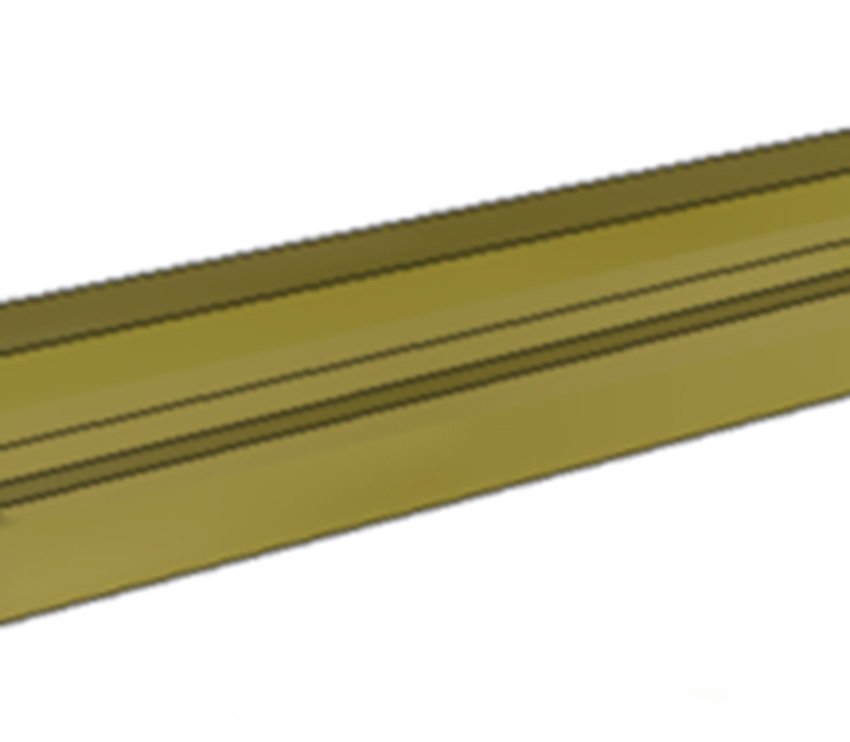
Choose from these LED extrusion profiles to create the effect you want:
Deep Surface

Thin Surface

Deep Recess

Shallow Rcss

Some installers prefer to rout a deeper groove in the handrail and fit the bare LED tape into it, without an extrusion. This arrangement will let you see the LEDs’ light, but keep the strip lights themselves from view. A depth of, say, 10mm will be enough to create a good effect.
White LED strip lights:
The output / brightness your handrail needs will depend on the location and surrounding illumination. As with most feature-lighting projects, we recommend either 5W or 10W LED tapes for a typical handrail installation using white LEDs.


For an exterior project, your external transformer(s) should be installed in a protected box (IP-rated), or fitted in an interior location and connected to the starter-lead points of your outdoor strip-lights using 1.5mm cabling. (These cables can run up to 20m away from the transformer with no loss of power.)
You may want to add a remote controller to manage your handrail’s dimming and set the brightness:


In locations with a lot of ambient illumination, or for bigger, more expensive installations intended to flood the area with light, we recommend choosing either:


To control your RGB/RGBW LEDs, a wireless remote control is usually the preferred option. You’ll probably want to fit the corresponding LED receiver in an interior location (wireless range is up to around 20m), or in an IP-rated protective box (like the power-supply discussed earlier).
…Or you could use a wall controller, perhaps with the facility to manage multiple lighting zones if this is part of a larger installation.


These recommendations apply to InStyle’s commercial-grade Epistar-branded LED strip lights. For lower-grade strip lights from elsewhere, adjust accordingly.